


The promise of an interactive whiteboard is one of seamless collaboration, but the reality often begins with a moment of frustration: how do you connect your device? This comprehensive guide is your single source of truth for ending the cable confusion. We will walk you through step-by-step, frustration-free instructions for connecting any device—from Windows laptops and MacBooks to Chromebooks, iPads, and even document cameras—to your smartboard. Whether you prefer a stable wired connection via HDMI and USB-C or the freedom of wireless casting with AirPlay and Miracast, you’ll find the clear answers you need. It’s time to move beyond tangled wires and technical headaches to unlock the true collaborative power of your interactive display.
You’ve got this incredible piece of technology in your classroom or conference room—a big, beautiful interactive whiteboard, ready to bring your ideas to life. There’s just one problem: getting your content onto the board feels like a puzzle. You’re fumbling with cables, clicking through confusing menus, and the clock is ticking. Your audience is waiting. Your lesson is stalled.
Sound familiar? This frustration is a universal pain point. Whether you’re a teacher trying to share a lesson from your Chromebook, a manager presenting a report from your laptop, or an expert demonstrating an app from your iPad, connection issues can derail your entire flow.

But it doesn’t have to be this hard.
Welcome to your definitive guide on connecting virtually any device to a smartboard. We’ll walk you through the wired and wireless methods for all your gadgets, from computers and laptops to iPhones and document cameras. More importantly, we’ll show you how modern interactive whiteboards, like the ones from NearHub, are designed to make these connections seamless, intuitive, and completely stress-free.
Let’s dive in and turn that beautiful screen into the powerful collaboration tool it was meant to be.
How to Connect a Computer to a Smartboard?
Connecting a desktop computer to a smartboard is a common setup for permanent installations in classrooms and boardrooms. It provides a stable, reliable connection for daily use. You generally have two paths: the trusty wired connection or a more modern wireless approach.
Method 1: The Wired Connection (Cables)
This is the most traditional method and often provides the most stable signal. The key is to identify the correct ports on both your computer and the smartboard.
Step-by-Step Guide:
Identify Your Ports: Look at the back of your computer and your smartboard. You’ll likely see a combination of these ports:
HDMI: The most common standard today. It carries both high-definition video and audio in a single cable.
DisplayPort: Another high-quality video/audio standard, often found on business-focused computers.
VGA: An older, analog video-only port. If you use this, you’ll need a separate audio cable (usually a 3.5mm jack) to get sound.
USB-A: This is crucial for enabling touch functionality. The smartboard’s touch capability is sent back to the computer via a USB cable.
Connect the Video Cable: Plug one end of your HDMI or DisplayPort cable into your computer and the other end into the corresponding input port on the smartboard. If using VGA, do the same and connect the separate audio cable.
Connect the USB Cable for Touch: This is the step everyone forgets! To make the screen interactive, you must connect a USB-A to USB-B cable from the smartboard to your computer. This tells the computer where you are touching on the screen.
Select the Correct Input Source: Use the smartboard’s remote control or on-screen menu to select the input source you just used (e.g., “HDMI 1,” “DisplayPort”).
Configure Your Display Settings: On your Windows or Mac computer, go to Display Settings. You can choose to:
Duplicate: Show the same screen on your computer and the smartboard. (Most common)
Extend: Use the smartboard as a second monitor, giving you more screen real estate.
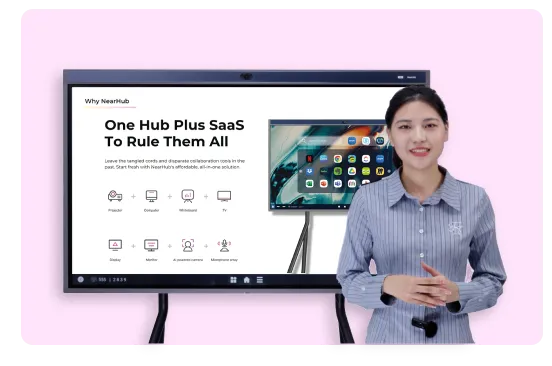
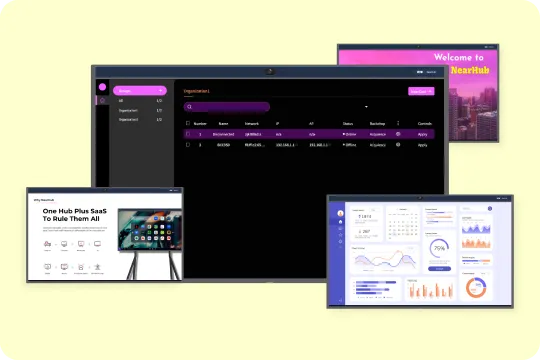
Pro-Tip: Modern smartboards, like those from NearHub, often feature a front-facing HDMI and USB port, so you don’t have to awkwardly reach around the back every time you want to connect a guest device.

Method 2: The Wireless Connection (Casting)
Tired of cables? A wireless connection declutters your space and offers more flexibility.
Step-by-Step Guide:
Ensure Network Connectivity: Make sure both your computer and the smartboard are connected to the same Wi-Fi network. This is non-negotiable for wireless casting.
Use Built-in Casting (Miracast): For Windows 10/11 computers:
Press the Windows key + K.
A “Connect” pane will appear, searching for available wireless displays.
Select your smartboard from the list. Many modern boards, including NearHub, have Miracast built-in.
If prompted, you may need to enter a PIN displayed on the smartboard.
Use Manufacturer’s Software: Some smartboards come with their own dedicated screen-sharing software. You would need to install a small application on your computer, which then connects to the board. NearHub boards have this capability, offering a robust, app-based connection that is often more stable than Miracast.
How to Connect a Smartboard to a Laptop?
Connecting a laptop is nearly identical to connecting a desktop computer, but with a focus on portability. The main difference is the types of ports you might find on a modern laptop.
Method 1: The Single-Cable Solution (USB-C)
This is the gold standard for modern laptops. If your laptop and smartboard both have a USB-C (or Thunderbolt 3/4) port that supports “DisplayPort Alt Mode,” you’re in luck.
Why USB-C is a Game-Changer:
A single USB-C cable can:
Transmit high-resolution video and audio to the board.
Transmit touch data from the board back to your laptop.
Even charge your laptop while it’s connected!
This one-cable-does-it-all approach is the epitome of convenience and is a signature feature on advanced interactive displays. For large rooms where clarity and simplicity are paramount, connecting a powerful laptop to an 86 board with a single USB-C cable is the ultimate professional setup.
Method 2: Using Adapters (The Dongle Life)
Many modern laptops (especially MacBooks and ultrabooks) have limited ports. This is where adapters, or “dongles,” come in.
USB-C to HDMI Adapter: The most common type. Plug it into your laptop’s USB-C port to get a full-size HDMI output.
Multi-Port Hub: A better option is a hub that provides HDMI, USB-A, and power delivery in one unit. This allows you to connect video (HDMI) and touch (USB-A) simultaneously.
Once you have the right adapter, the steps are the same as connecting a desktop computer: plug in video, plug in USB for touch, and select the correct source.
Method 3: Wireless Laptop Connection
As with desktops, wireless casting is a fantastic option. Pressing Windows Key + K for Miracast is the quickest way on a PC. For MacBooks, you’ll need a smartboard that supports AirPlay.
The NearHub Advantage: NearHub boards are designed for a “Bring Your Own Device” (BYOD) environment. They have built-in support for Miracast, AirPlay, and Chromecast, eliminating the guesswork. No matter what kind of laptop your team member brings, they can connect wirelessly in seconds.
How to Connect a Chromebook to a Smartboard?
Chromebooks are a staple in modern education, so seamless integration with a smartboard is essential. The process is a bit different from Windows or macOS.
Method 1: The Wired Connection
Most modern Chromebooks have USB-C ports.
Connect via USB-C or HDMI Adapter:
If the smartboard has a USB-C video input: Use a single USB-C to USB-C cable. This should handle video, audio, and touch automatically.
If the smartboard has HDMI: Use a USB-C to HDMI adapter. You will still need to connect a separate USB-A to USB-B cable for touch functionality.
Set Up the Display: Once connected, your Chromebook will automatically detect the second screen. Click on the time in the bottom-right corner, go to Settings > Device > Displays, and choose to mirror or extend your desktop.
Method 2: The Wireless Connection (Google Cast)
This is the native and most efficient way to connect a Chromebook wirelessly.
Step-by-Step Guide:
Connect to the Same Wi-Fi: Ensure the Chromebook and the smartboard are on the same network.
Open the Chrome Browser: The casting function is built directly into the browser.
Click the Three-Dot Menu: In the top-right corner of Chrome, click the menu icon.
Select “Cast…”: A “Cast” tab will open, showing available devices.
Choose Your Source: At the bottom of the Cast tab, there’s a “Sources” dropdown. You can choose to:
Cast Tab: Share only the content of your current browser tab.
Cast Desktop: Share your entire screen (this is what you want for most presentations).
Cast File: Share a specific video or audio file.
Select Your Smartboard: Click on the name of your interactive whiteboard from the list to begin casting.
Important Note: Standard Google Casting only shares your screen; it does not transmit touch functionality back to the Chromebook. For full interactivity, you either need a wired connection or a smartboard with a dedicated app (like NearHub’s) that enables wireless touch.
How to Connect an iPad to a Smartboard?

The iPad is a powerful tool for visual learning and dynamic presentations. Getting its screen onto the big board is a breeze with Apple’s ecosystem.
Method 1: Wireless with AirPlay (The Best Way)
AirPlay is Apple’s proprietary streaming technology, and it’s incredibly easy to use.
Step-by-Step Guide:
Check for Compatibility: Your smartboard must support AirPlay. This is a key feature to look for when purchasing a new board. (Hint: NearHub boards have it built-in).
Connect to the Same Wi-Fi: Both the iPad and the smartboard must be on the same network.
Open Control Center:
On newer iPads (without a home button): Swipe down from the top-right corner.
On older iPads (with a home button): Swipe up from the bottom of the screen.
Tap “Screen Mirroring”: Look for the icon with two overlapping rectangles.
Select Your Smartboard: A list of available AirPlay devices will appear. Tap the name of your smartboard.
Enter the Passcode: A passcode may appear on the smartboard. Enter it on your iPad to complete the connection. Your iPad screen will now be mirrored on the board.
Method 2: Wired with an Adapter
If your network is unreliable or your board doesn’t support AirPlay, a wired connection is your backup.
Get the Right Adapter: You will need an Apple Lightning to Digital AV Adapter (for iPads with a Lightning port) or a suitable USB-C to HDMI adapter (for newer iPad Pro/Air models).
Connect the Cables:
Plug the adapter into your iPad.
Connect an HDMI cable from the adapter to an HDMI input on the smartboard.
The Apple adapter also has a charging port, so you can keep your iPad powered during long sessions.
Select the HDMI Source: On your smartboard, switch to the correct HDMI input. Your iPad screen should appear automatically. Note that this method does not support touch functionality.
How to Connect an iPhone to a Smartboard?
Connecting an iPhone follows the exact same principles as connecting an iPad. It’s perfect for quickly showing a photo, a short video, or a mobile app.
Method 1: Wireless with AirPlay Screen Mirroring
This is the preferred method for its speed and convenience.
Ensure Both Devices are on the Same Wi-Fi.
Open Control Center on your iPhone (swipe down from the top-right on newer models, or up from the bottom on older ones).
Tap “Screen Mirroring.”
Select your smartboard from the list of devices.
Enter the on-screen passcode if prompted.
Method 2: Wired with a Lightning to Digital AV Adapter
Just like with the iPad, this is your reliable, non-network option.
Purchase an Apple Lightning to Digital AV Adapter.
Plug the adapter into your iPhone’s Lightning port.
Connect an HDMI cable from the adapter to the smartboard.
Switch the smartboard’s input to the corresponding HDMI source.

Whether you’re using an iPhone or an iPad, a versatile board like the smart board 55 is an ideal canvas. Its size is perfect for huddle rooms and small classrooms where quick, mobile-driven collaboration is key. In fact, the nearhub s55 is specifically designed to make these quick connections a core part of its user experience.
How to Connect a Document Camera to a Smartboard?
Document cameras (often called “doc cams” or by the brand name “Elmo”) are essential for showing physical objects, book pages, or live science experiments on a large screen.
Method 1: Direct HDMI Connection
Many modern document cameras have an HDMI output port. This is the simplest way to get a high-quality image.
Connect an HDMI cable from the document camera’s “HDMI Out” port to an “HDMI In” port on the smartboard.
Power on the document camera.
On the smartboard, select the correct HDMI input source.
You should now see a live feed from your document camera. You can use the camera’s physical zoom and focus buttons to adjust the image.
Method 2: USB Connection to a Computer
Some document cameras connect to a computer via USB, using software to display the image.
Connect the document camera to your computer (the one that’s already connected to the smartboard) using a USB cable.
Install the document camera’s software on the computer.
Open the software. It will display the live feed from the camera in a window on your desktop.
Since your computer is already mirrored to the smartboard, this window will be visible to everyone. You can often make it full-screen.
The advantage of this method is that you can use the smartboard’s annotation tools to draw directly over the live video feed from the document camera, a powerful feature for teaching.
How to Connect an Elmo to a Smartboard?
“Elmo” is a very popular brand of document camera, so it deserves its own mention. The connection process for an Elmo is identical to the general document camera instructions above.
For Newer Elmo Models (with HDMI): Use an HDMI cable to connect directly from the Elmo’s HDMI output to the smartboard’s HDMI input. This is the quickest and easiest setup.
For Older Elmo Models (USB or VGA only):
USB: Connect the Elmo to a computer via USB and use the Elmo Interactive Toolbox software to display the image.
VGA: Connect the Elmo’s VGA output to the smartboard’s VGA input. Remember to also connect a separate audio cable if your Elmo model has a microphone.
Troubleshooting Tip: If you connect a document camera and see “No Signal,” double-check that you’ve selected the correct input source on the smartboard and that the camera is powered on.
Frequently Asked Questions (FAQs)
Q: Why isn’t the touch screen working after I connected my laptop to the smartboard?
A: This is almost always because the USB touch cable is not connected. In addition to the video cable (like HDMI), you must connect a USB cable from the smartboard to your computer to enable interactivity. If it’s connected and still not working, you may need to install a driver for the board.
Q: How do I get audio to play through the smartboard’s speakers?
A: If you’re using HDMI or USB-C, audio should be sent automatically. If it isn’t, click the speaker icon on your computer’s taskbar and select the smartboard as the audio output device. If you’re using a VGA cable, you must connect a separate 3.5mm audio cable from your computer’s headphone jack to the board’s “Audio In” port.
Q: Can I connect my Android phone or tablet to the smartboard?
A: Yes! Most modern Android devices use a technology called “Smart View,” “Screen Cast,” or “Miracast.” You can typically find this in your phone’s quick settings panel (swipe down from the top). As long as your smartboard and phone are on the same Wi-Fi, you can mirror your screen wirelessly, just like with an iPhone.
Q: The image on the smartboard looks fuzzy or doesn’t fit the screen. How do I fix the resolution?
A: Your computer may have selected the wrong screen resolution. Go to your computer’s Display Settings, select the smartboard display, and choose the “Recommended” resolution. This is usually 1920x1080 (Full HD) or 3840x2160 (4K) for newer boards.
Q: What is the best way to connect any device without worrying about cables or compatibility?
A: The best way is to invest in a modern interactive whiteboard with multi-platform wireless casting built-in. A NearHub board, for example, natively supports AirPlay (for Apple), Miracast (for Windows/Android), and Chromecast (for Chromebooks/Chrome browser), plus its own dedicated app. This removes 99% of the connection headaches.
Conclusion: Connection Without Complication
As we’ve seen, there’s always a way to connect your device to a smartboard. But the path of least resistance—the one that saves you time, reduces stress, and just works—is to have a system designed for modern, flexible collaboration.
Fumbling with a bag of dongles and cables is a relic of the past. The future is walking into a room and casting your screen with two taps. It’s connecting your laptop with a single, elegant USB-C cable. It’s knowing that whatever device your colleague or student brings, they can share their ideas instantly.
If you’re tired of the connection struggle and ready for an interactive whiteboard that makes collaboration truly seamless, it’s time to explore what a modern solution can do for you.


